-
-
March 24, 2017 at 10:12 am #122694
 Jason E.Participant
I’m not sure if this is a too basic a question for the forums. I may have known how to do this before but must have forgotten if I knew it at all.
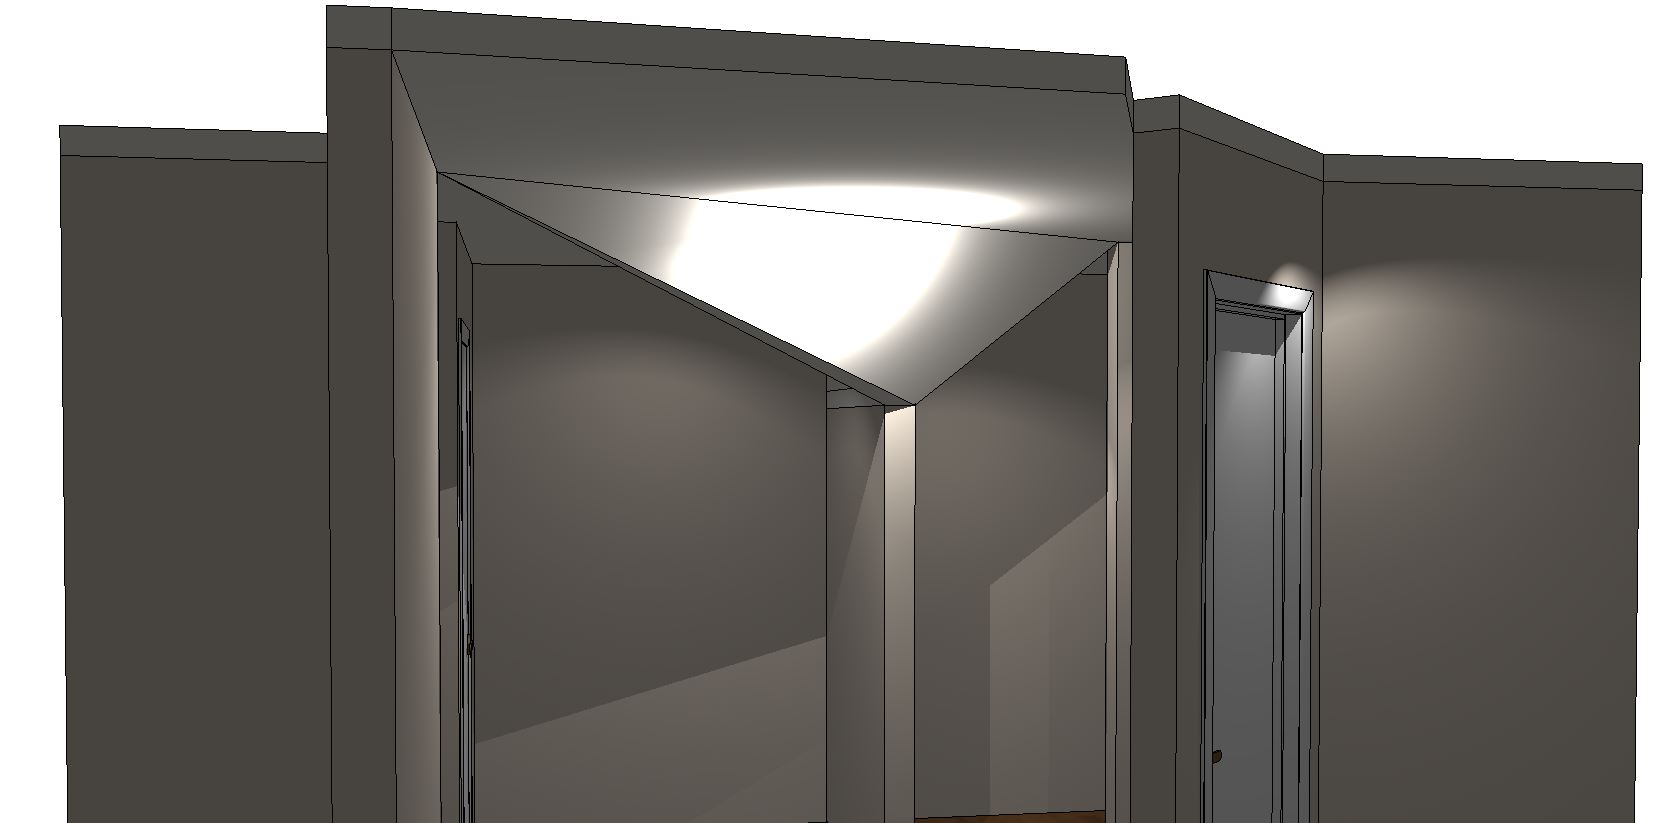
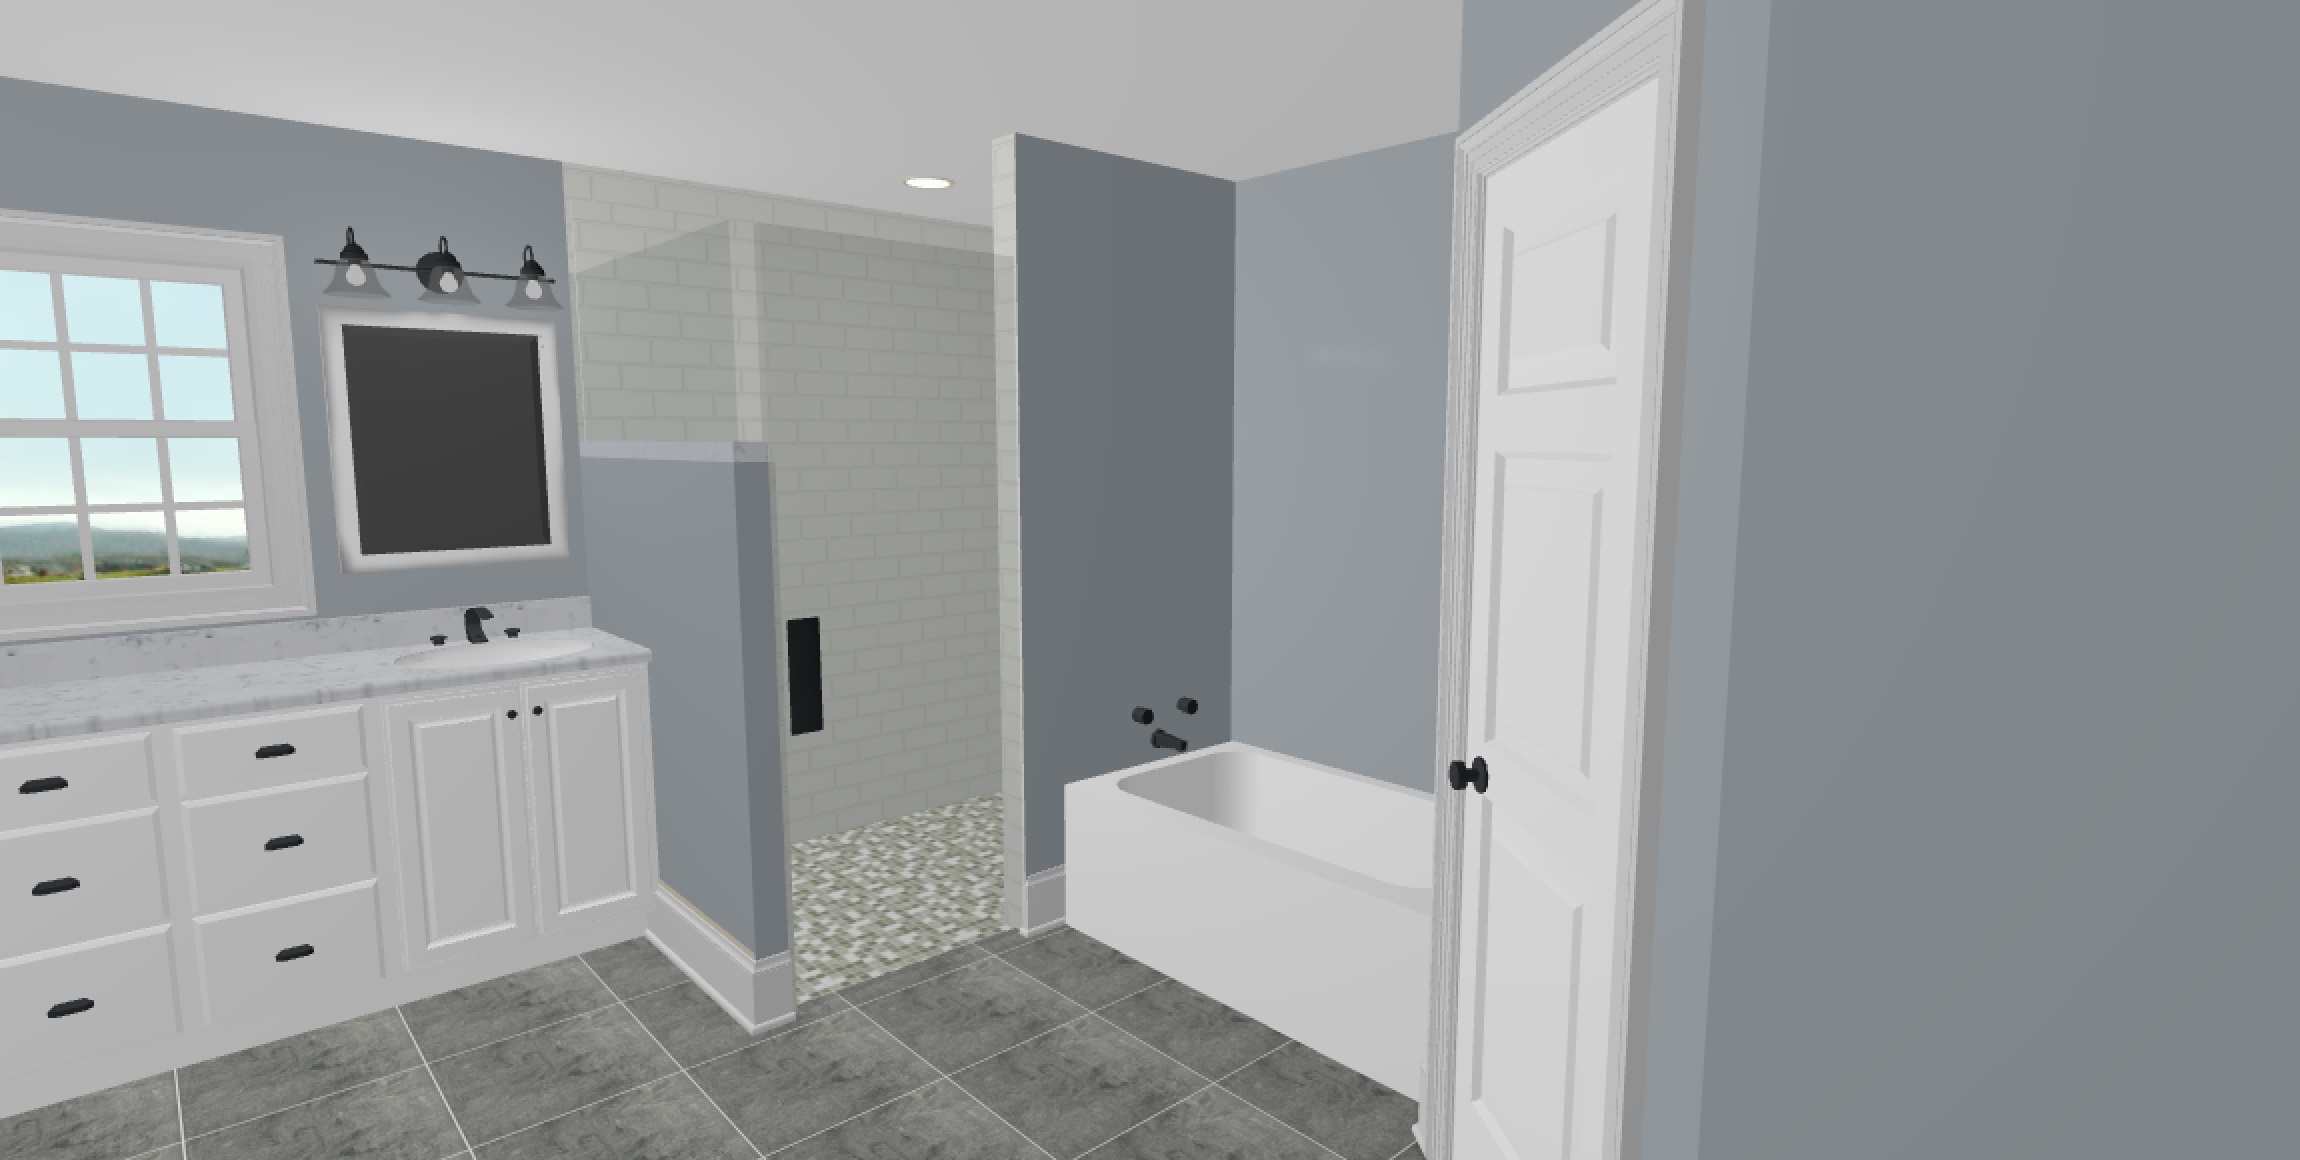
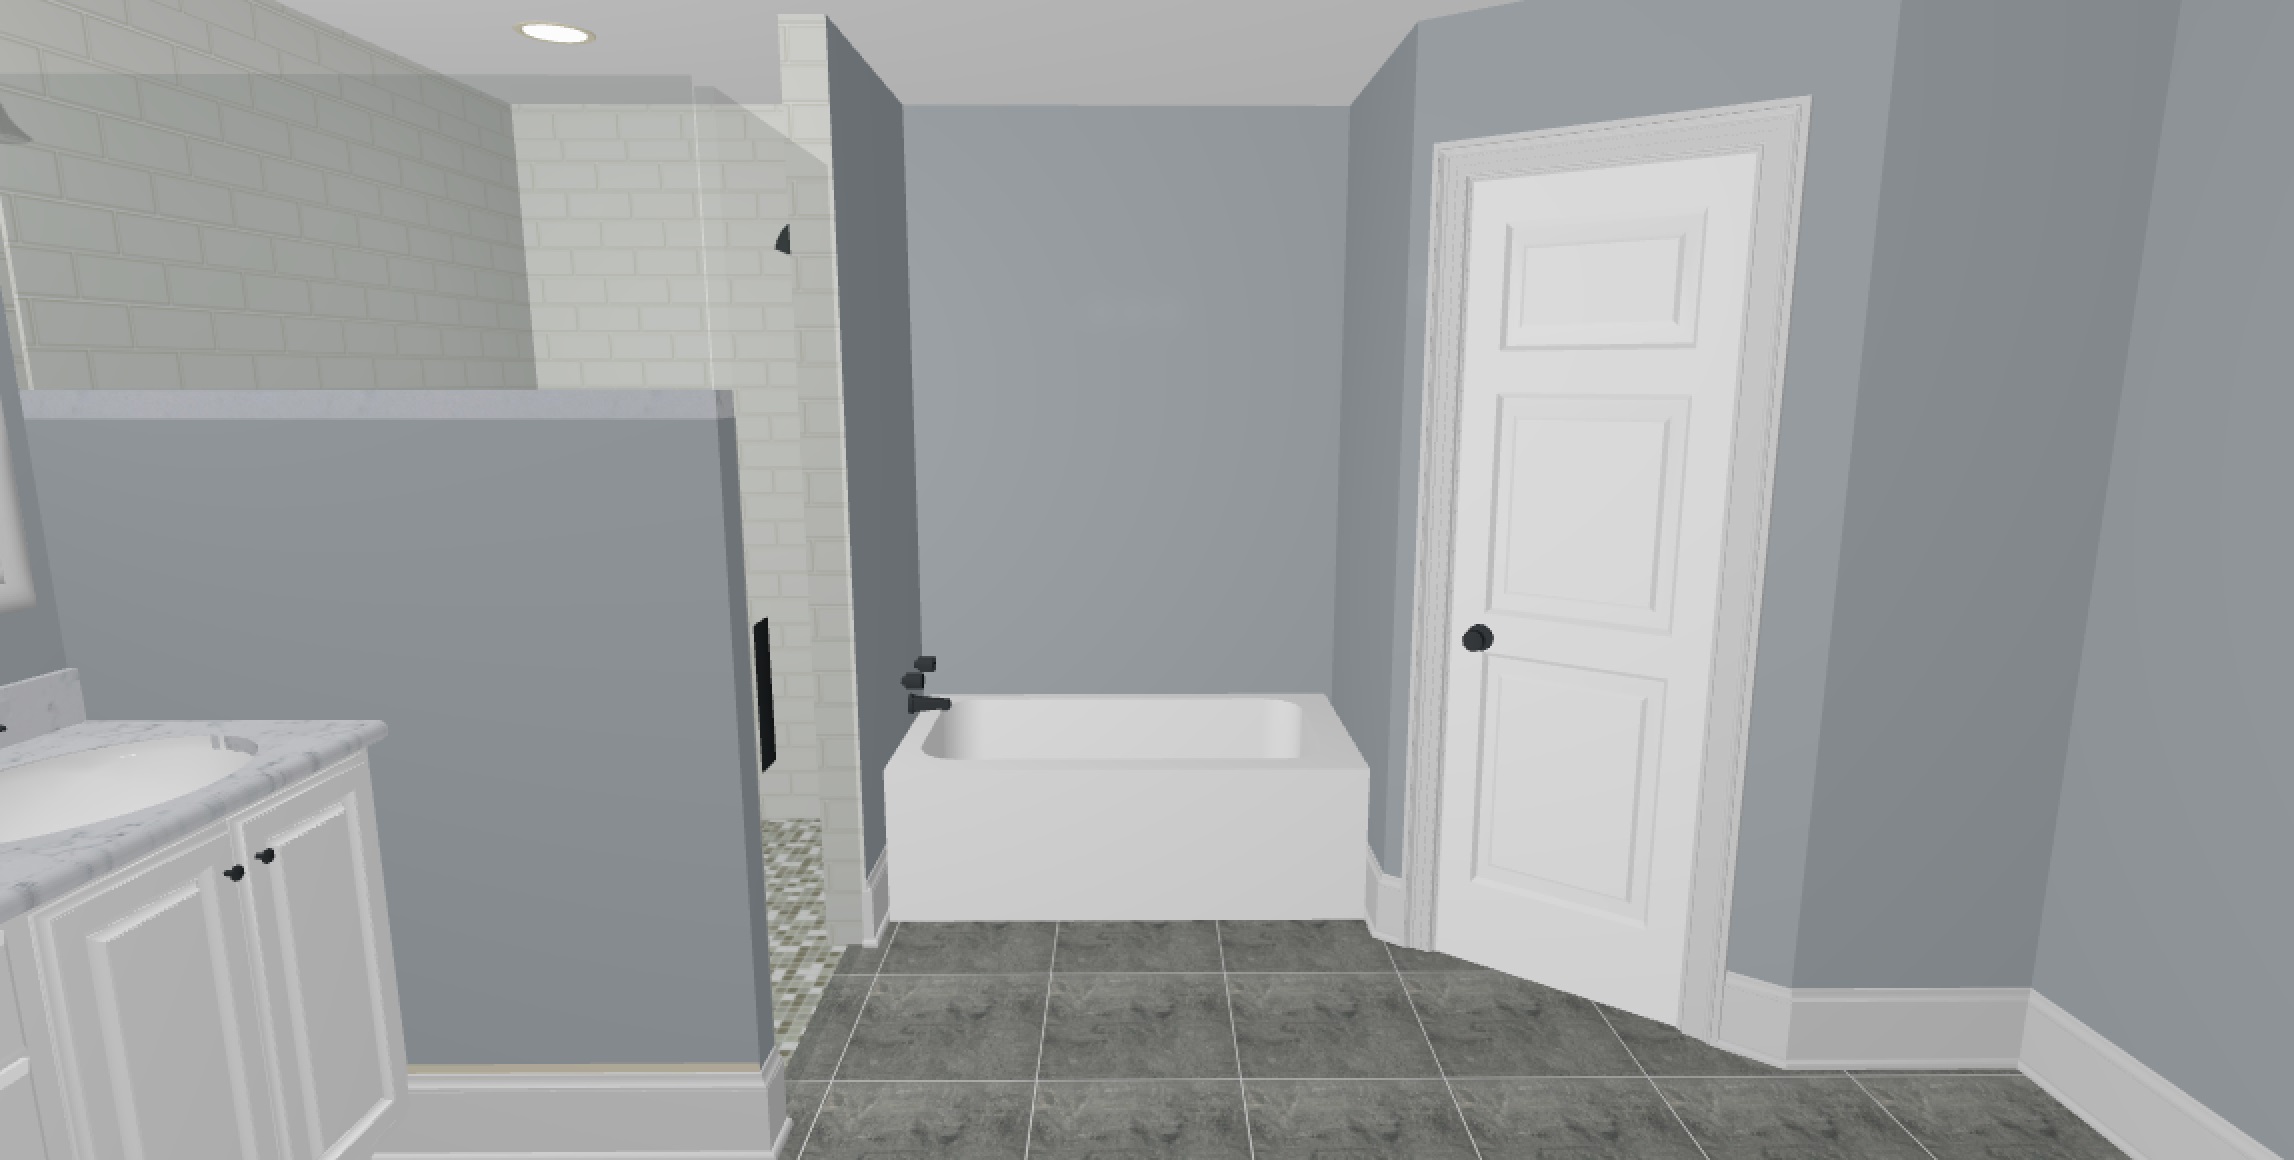
I have a client who passed along an image of a design another designer created. The shower in the design has the top portion of it as glass with a space before the ceiling but I don’t know how to make it look like this. If someone could point me in the right direction I’d appreciate it.
Also, I could probably fudge it make the shower door too but I’m open to suggestions on how to do it better.
I’ve noticed this, and at least one other design with walls of different heights the ceiling gets sucked down to the short walls making the room look like a surrealist paint and I’m curious what I’m doing to cause that and prevent it from happening.
I’ve attached pics of both of these.
-
March 27, 2017 at 8:26 pm #122930
 Mike LangensiepenPilot Pro
Not an ideal solution but I’d use full height walls and use wall cutouts.
Neil, this is obviously a bug – has it been logged?
-
May 23, 2017 at 12:05 pm #131176
Lisa Rendueles
ParticipantThere’s probably a better way, but I use ROOM TOP, Predefined top, straight top. In attributes, change the “countertop height” (thickness) to the glass height you need, and change the texture to clear glass. Then on the floor plan, edit shape to make one dimension the length of your glass, and the other dimension to your glass thickness, then place it on your wall & adjust height. Voila, frameless glass.
-
May 29, 2017 at 11:54 am #131927
Jonathan Desimini
ParticipantI believe the easiest way is to draw the walls, select the “walls” you want as shower doors, go to the wall properties, adjust the height and thickness of the wall or walls that you created for the shower and then go to the “type” tab (second one) and click do not connect to ceiling. I usually press Apply & OK and then go back to properties and change the texture of those walls to glass.
I’ve only done it once or twice but its definitely a quick and easy way to build glass walls.
Attachments:
-
May 30, 2017 at 10:19 am #131943Participant
For the shower door: I just played with a regular slab door DOOR.INT, in attributes, change the frame construction type to no frame, change all textures to glass.
The only problem is the door and jamb thickness. No matter what thickness you make the wall, the door jamb will always be 1″ thicker, so the rendering is a little off, but it works!
Wish we had a shower door in the catalogs that does not require a wall for placement, where we could adjust size, thickness, door pull, etc.
-
June 14, 2017 at 4:35 pm #134977
Chris Blackman
ParticipantMake the wall.
Adjust the wall height to, say, 34 inches.
- catalog:ROOM_PLU_1
- categories shower , shower doors and panels
- SHOW.PAN.0FRM.EXP
Place the shower wall in the design, right-click and in attributes set up/down to 34 inches, then set the height to whatever your ceiling height is minus 34 inches. Or subtract more the 34 inches if you want the glass wall NOT to meet the ceiling.
In the wall attributes select either Do NOT connect to ceiling or Depends on Height. Both of these will be found on the Type Tab of the wall attributes setting.
Hope that helps.
-

You must be logged in to reply to this topic.